My next hill based project (10 years later, man I wish I lived in a bigger place) was to build a hill with a bunker inside of it, but on a certain side it just looked like a steep hill and for the most part, mission accomplished, but with some pitfalls. First was my rough design. I had a large piece of cardboard as the base and taped other bits of cardboard with the rough outline of what I wanted. Made sure the heights were right so a figure crouching could aim over the front wall. Then inside was a little room, that could be like a planning, storage or radio room.


Instead of using wire mesh this time as I was using Plaster of Paris, I decided to use thick grocery bag paper. Not as sturdy as the wire, but I knew the plaster wasn’t going to be as thick as the wall plaster so I thought the paper would be a better idea. I just taped it down and then used pins to hold the paper in place.


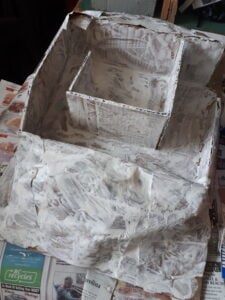
Here’s another photo with the brown paper as part of the hill. The second picture shows the base for the top part of the hill. I cut a hole in the bottom as I set it up so that one could climb up and down from inside of the inner room.


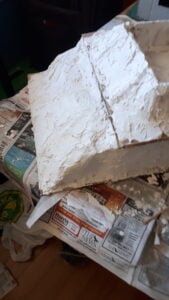
When it came time to put on the plaster, I had to put on several layers. To be quite honest I’m not sure how many but it was close to 7. It could be that I was mixing in too much water so the plaster was too watery. It did dry fast though. The wetness of the plaster would make the paper wet so I did have to wait for that to dry as well too. I used a putty knife to apply the mixture though in some cases I would just pour it and spread it. I did have difficulty with that one corner as you can see the paper in the corner sticking out a lot.

A couple layers later and the shape of the hill looks a lot better and more textured. The top part as you can see I put in popsicle sticks to form a wooden side so that it looked similar to a trench. I tried to make the shape of the bottom of the hill match the top part so that it looked like a consistent hill.

For the inside of the bunker I used longer stirring sticks to look like wooden planks shoring up the sides. This is the inside of a hill after all. I did have a hard time keeping the stirring sticks stuck so I did end up having to pour white elmer glue on them to keep them in place.


Then I added some paint. The ground I painted a dark brown and most of the grass parts I made green. Then the areas on the sides and around the edges of the trenches, I did a light brown.


I put in some wooden poles to help support the top piece, not so much because it was heavy, but more just to keep it balanced. I should’ve planned to have the top part hang down more around where it was open as it looked too open and exposed instead of more camouflaged and built into the hill. Perhaps I’ll add another piece to it one day so that it does have a better concealed look to it. The hill is quite steep and requires figures to climb up it instead of simply walking up it, but it does make for a great vantage and defensible point. I did find the Plaster of Paris to be far more fragile than the plaster, bits of it have chipped already, requiring me to have to fix it. The plaster is also quite light so its easy to accidentally move the hill without intending to. I think the piece turned out well but I probably would’ve had an easier time if I had used the same wall plaster I had in my previous construction.
